,fit(cover),quality(100)/https%3A%2F%2Ftrackercdn.com%2Fghost%2Fimages%2F2023%2F7%2F1723_pearl-map-valorant.png/image.jpg)
Being able to eliminate an opponent without fighting them head-on and actually seeing their figure has to be one of the most satisfying moments in Valorant. It could be an easy kill, and most often poses less risk. Just like in other maps in Valorant, there are areas and walls on Pearl that may seem to be made of paper due to how easy it is for bullets to penetrate it. Because of that, knowing which of these walls is wallbangable can be valuable information, and put you at a great advantage.
Here is where to find and how to use every wallbang location on Pearl in Valorant.
How to wallbang in Valorant
Wallbanging is when you shoot through a wall, box, terrain or any obstacle and allow the bullets to penetrate through to either dish out some damage or eventually kill an opponent. This is especially useful in areas where most players hide, allowing you to clear it without having to expose yourself.
This works best especially if you have an initiator with you who can reveal opponents such as Sova's Recon Bolt, Fade's Hunt or for sentinels, Cypher's Spycam and Trapwire. Tagging them highlights your foes' figures making it easy for you to shoot them.
However, it all depends on the material and thickness of the wall. This goes to say that not every wall can be shot through, and sometimes may even require heavy penetration weapons like Odin. For paper-thin walls though, light to medium penetration weapons are usually enough.
Related: VALORANT: Every Wallbang Spot on Lotus
All Wallbang Spots on Pearl in Valorant
Box and Crates
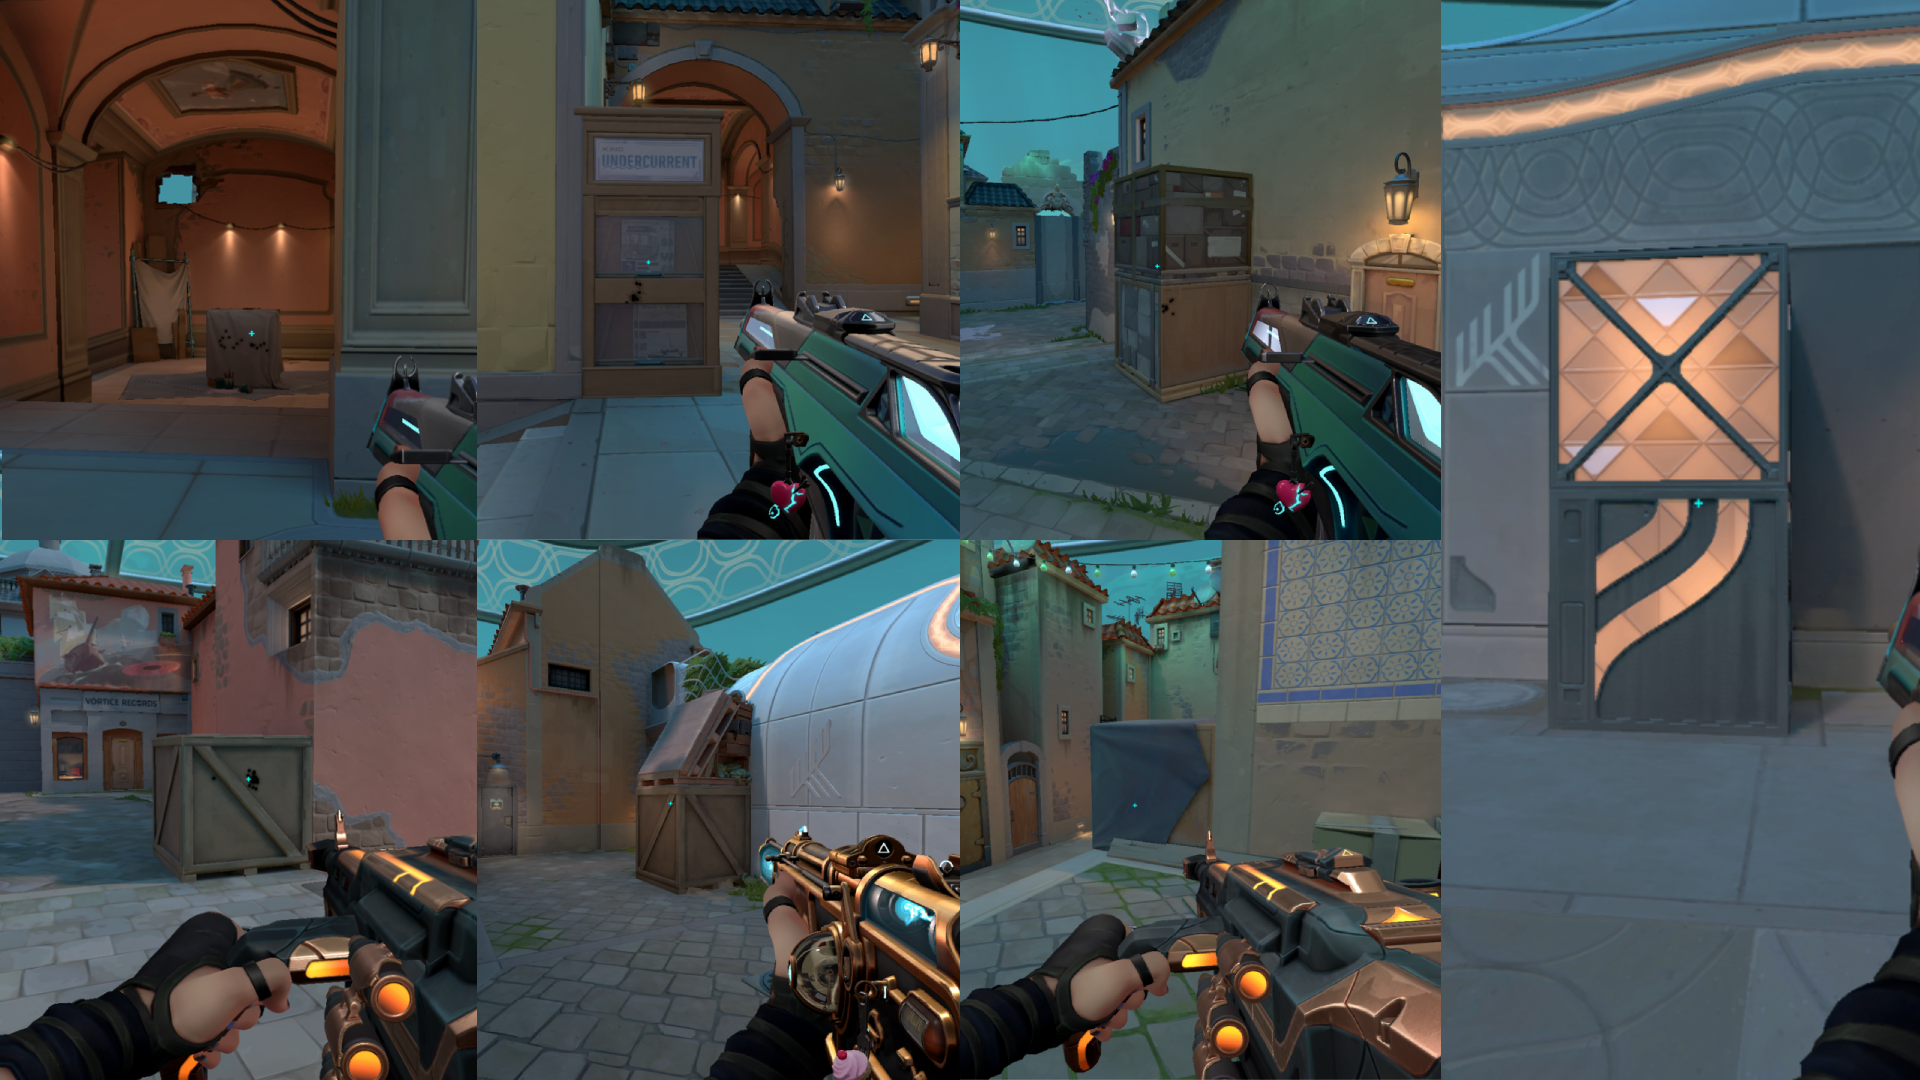
Much like the rest of Valorant maps, wooden boxes and radianite crates are scattered around the map. These boxes usually do not just stand there as a decor, but actually has its uses. For instance, some players tend to hide behind these boxes and crates to seek cover or to eliminate foes who do not know how to check corners. Hence, one of the best things you can do is to spam these boxes if you suspect that someone might be behind it through any mid to high-penetration weapons.
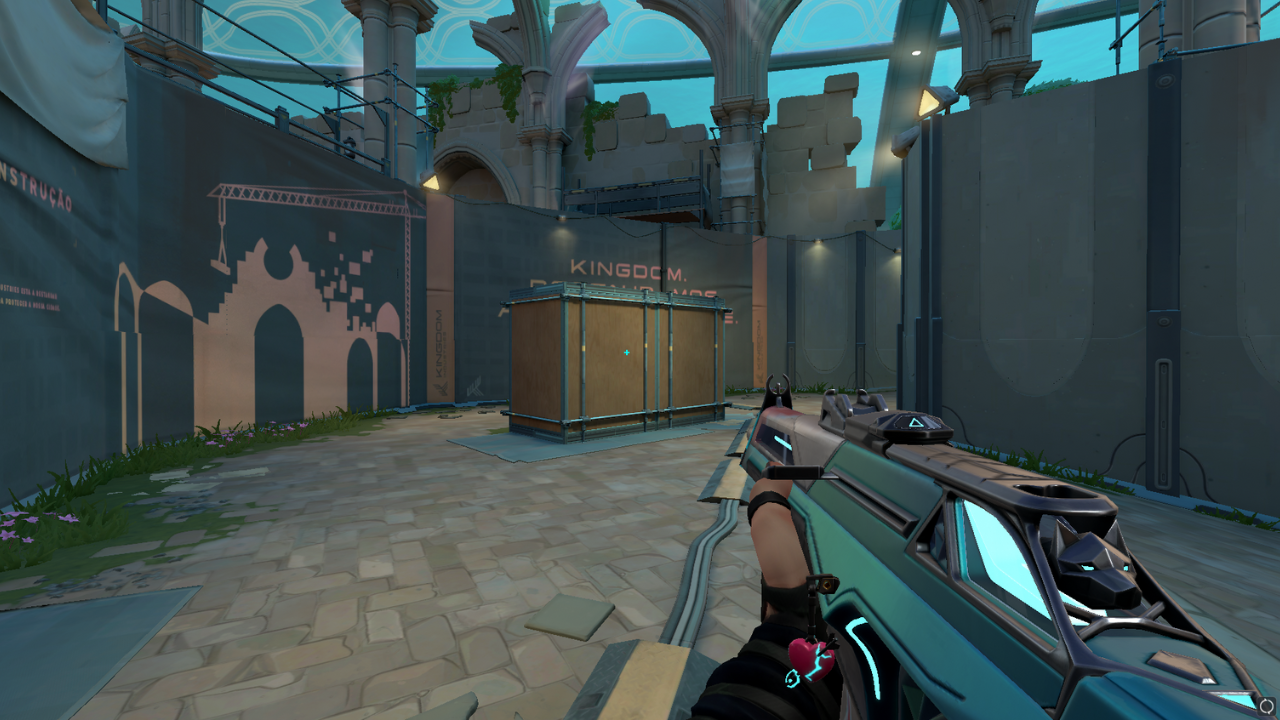
A Main
If you're playing in A Main, there's a big box you can shoot at to take out enemies who are trying to seek cover from you.
This requires medium to heavy penetration weapons.
A lobby all weapons
In A lobby, there’s a wall that you can shoot through. However, it is not tall enough to cover an entire agent. But, hey at least it’s wallbangable.
Any weapon can be used.

A Dugout med to high
Ah yes, the dugout. A lot of players have died, or at least have witnessed agents dying to someone hiding inside this area. Good thing, you can shoot through this thin wall to easily eliminate opponents, especially if you have any ability that can reveal them like a sova recon, without having the need to expose yourself. At the same time, you can use this area to your advantage during postplant situations. Plant the spike on default or anywhere near the dugout and spam through the wall for an easy kill or to deny defuse.
Requires medium to high penetration weapons.
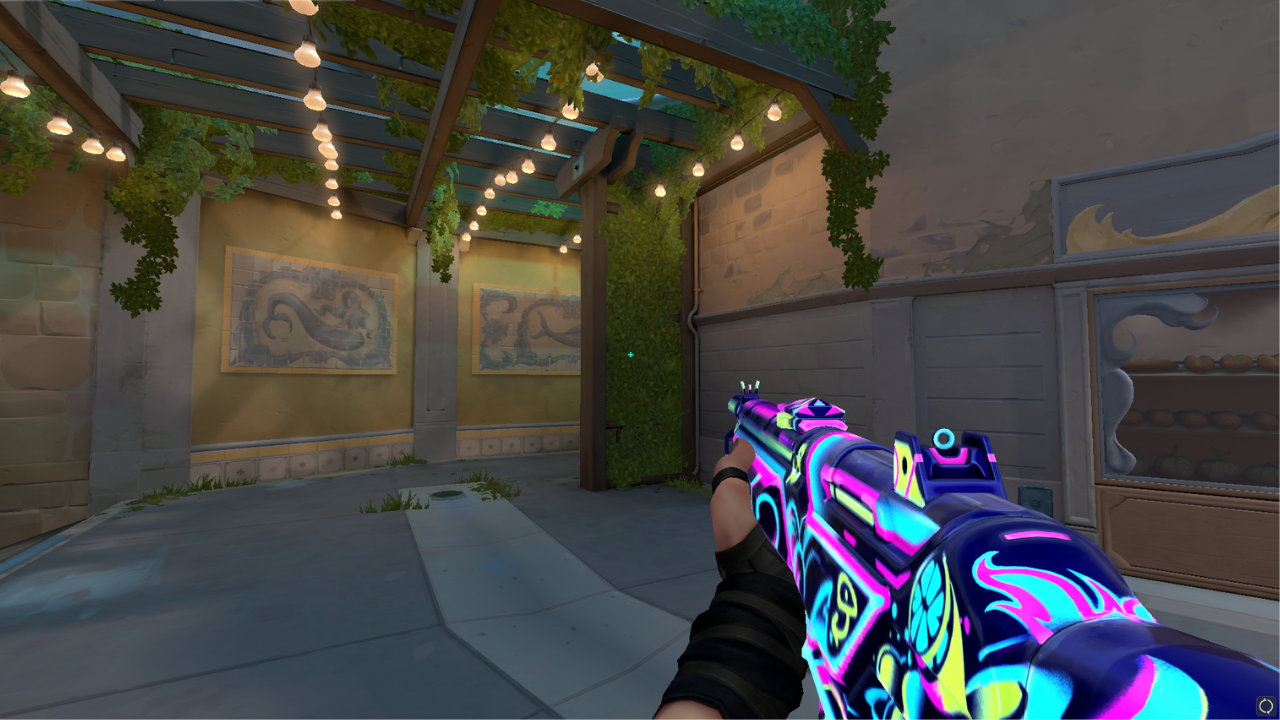
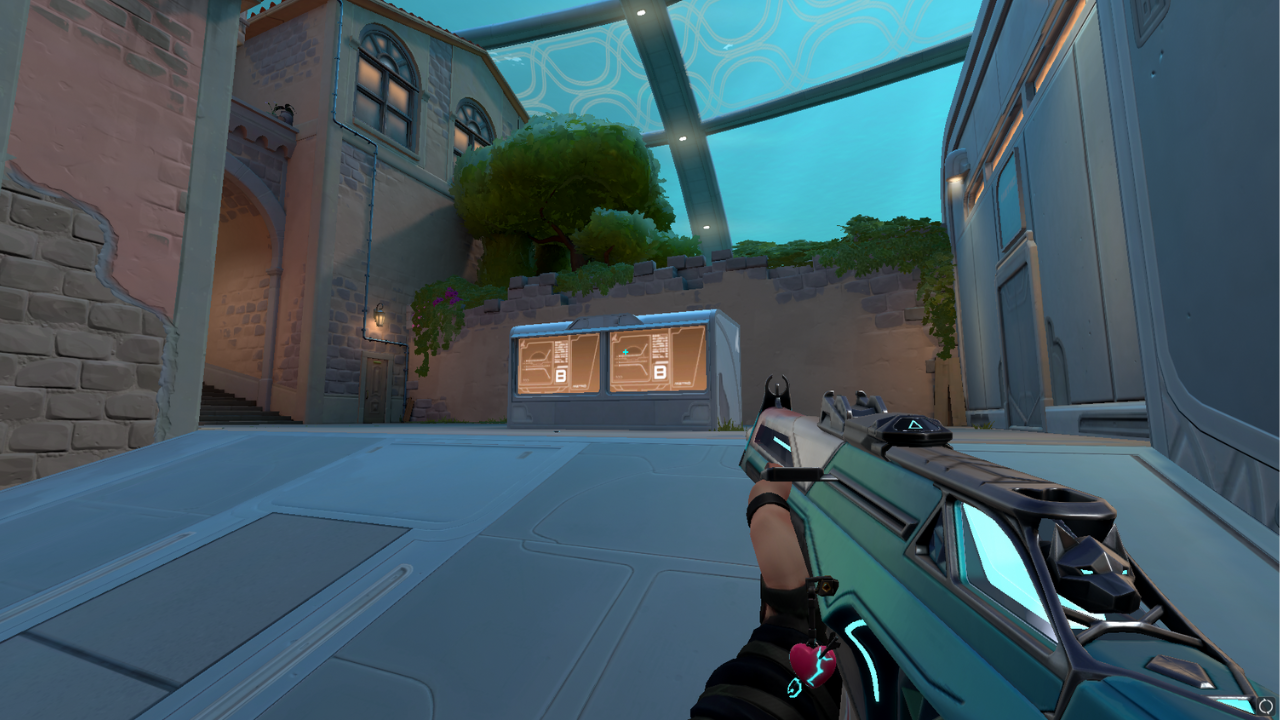
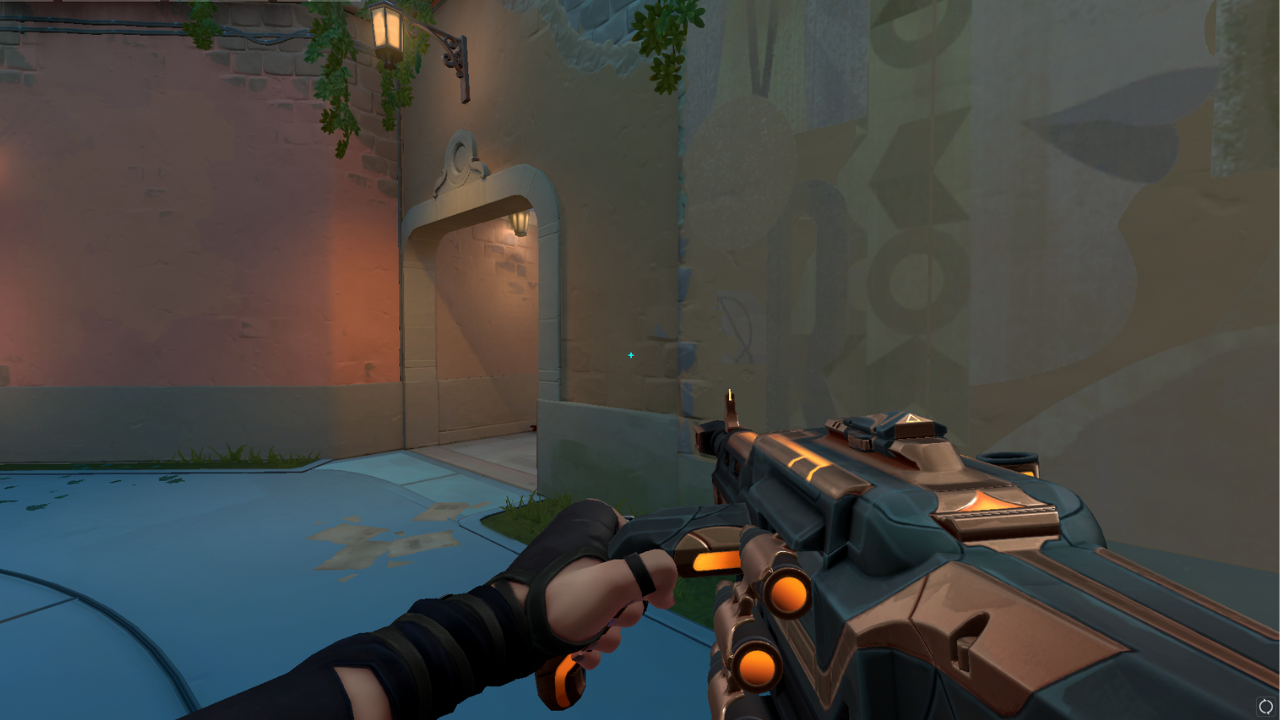
A Secret/Flowers all
This thin wall right here sitting just between flowers and secret can be wallbanged. Due to its thickness, you can tear through this wall using any weapon.
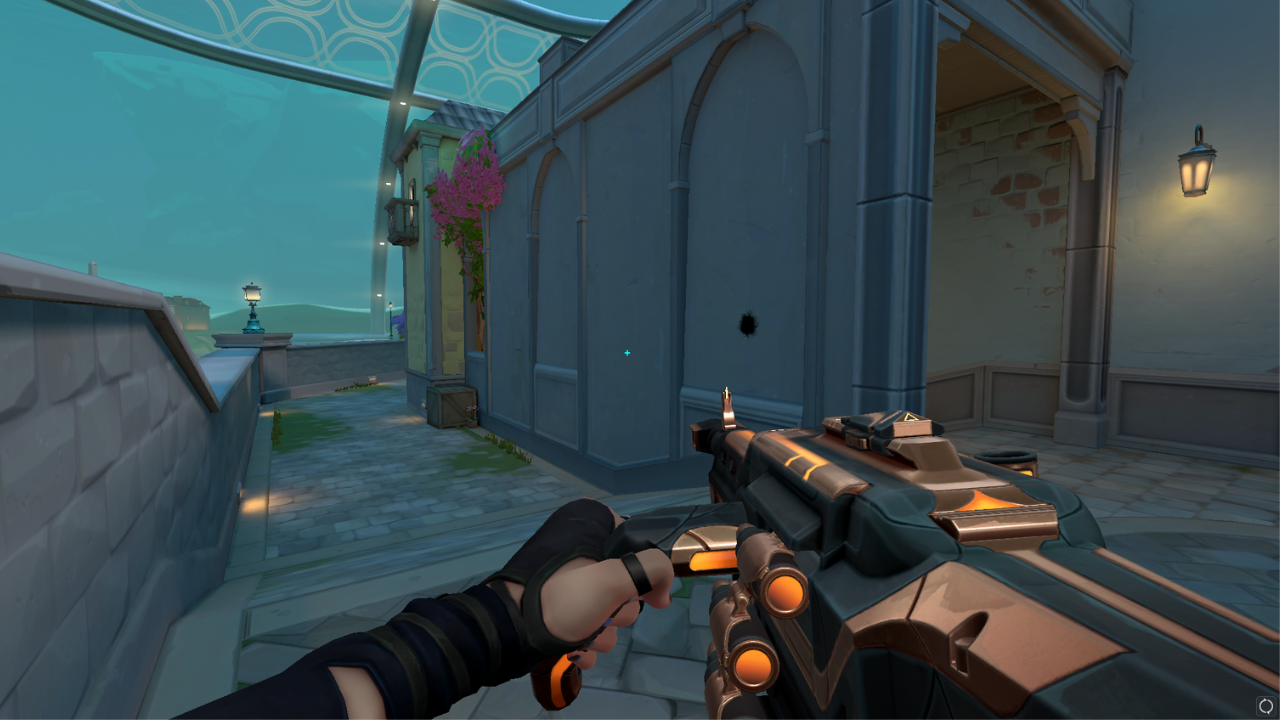
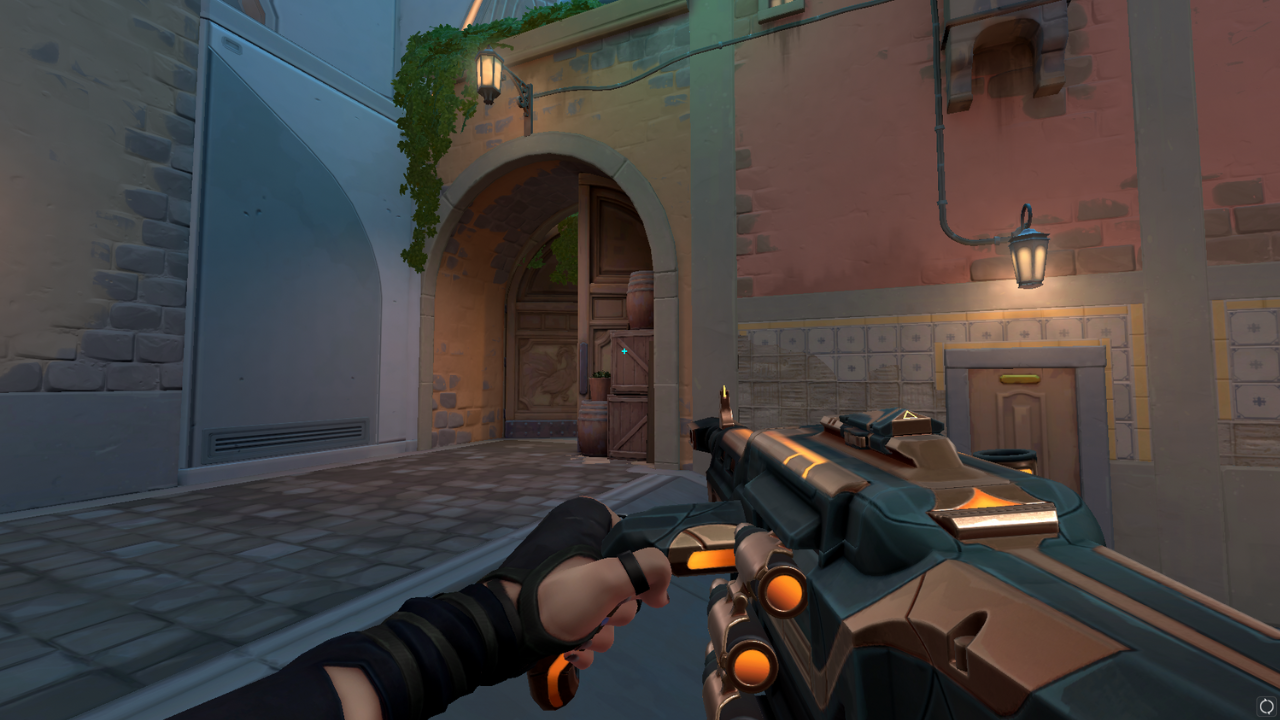
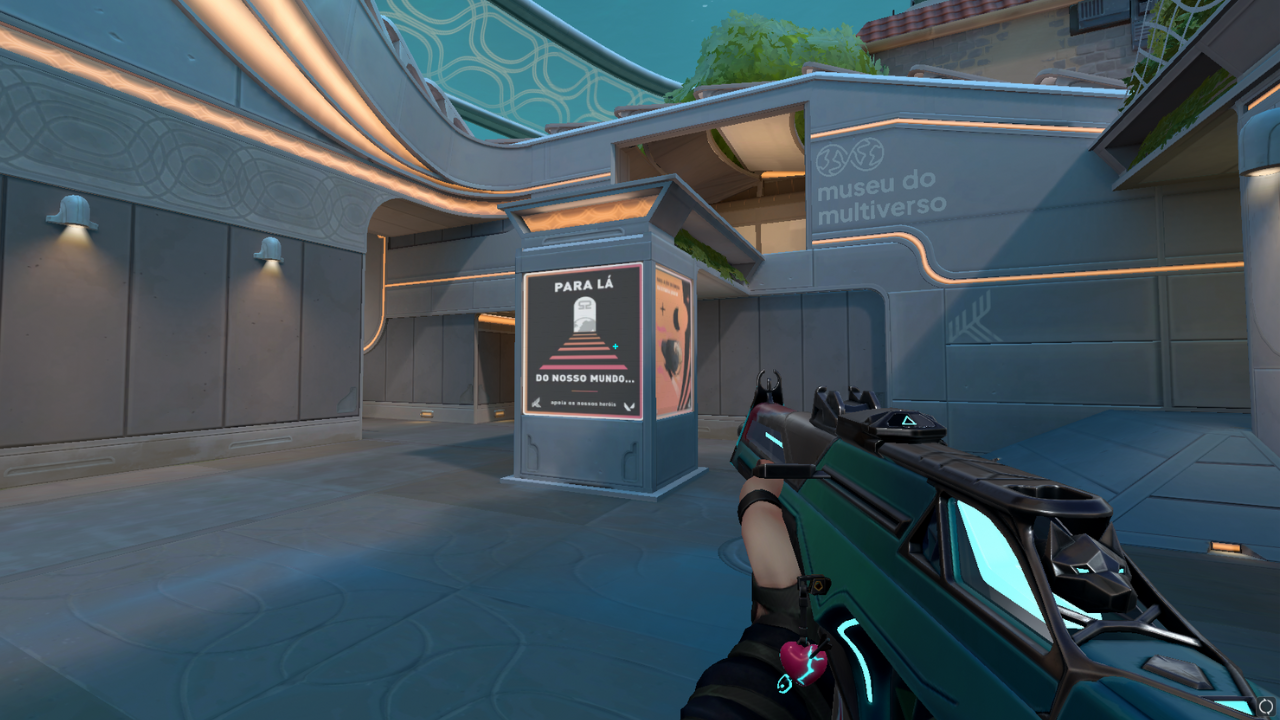
A Art to Lobby high
Did you know that you can shoot through this wall? Apparently, there is a hole where you can attach a cypher cam, throw you fade or sova recon in to reveal enemies behind that wall. With that you can use this information to know where to shoot at. This way, you can score a kill or maybe two from a safe location just by knowing this information.
Only heavy-penetration weapons such as Odin, Sheriff and Guardian can be utilized here.

Connector wall
This thin wall right here at the connector near art and A link can be shot through as well with any weapon.
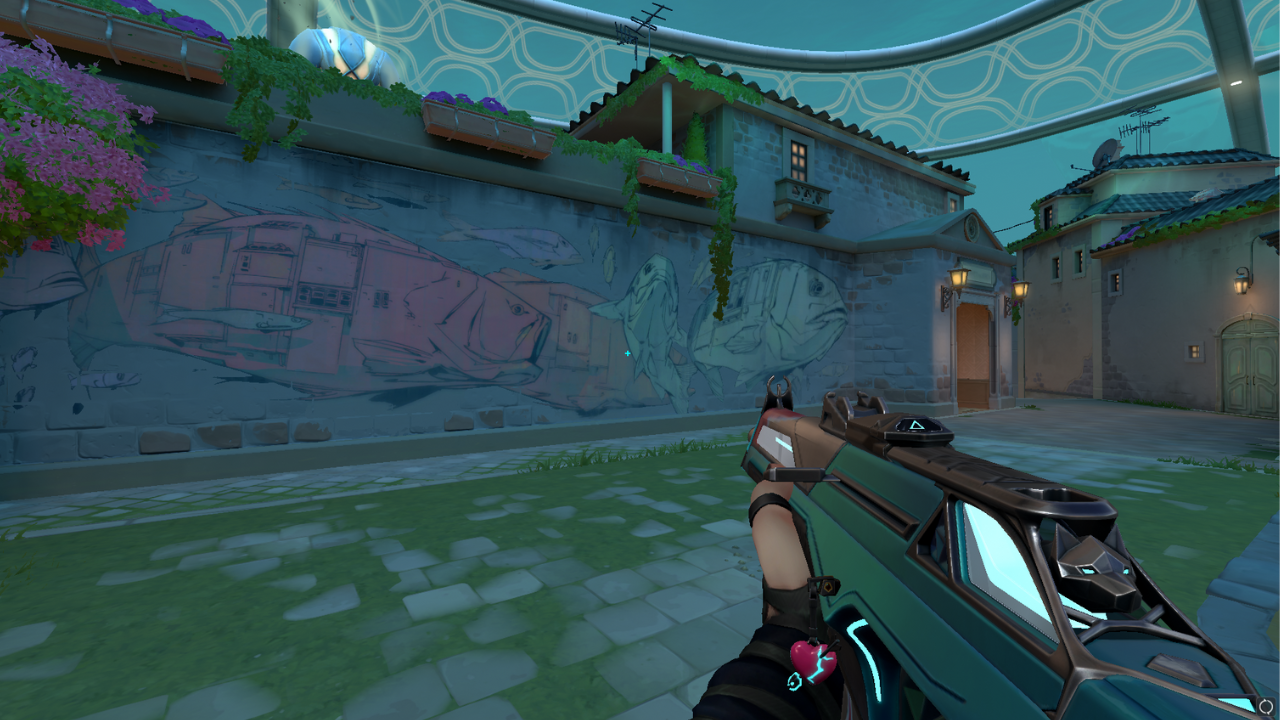
Sewer/Water
Some players could try to head to the defender’s spawn to either flank or catch rotating enemies from either site. However, one of the main threats when doing so is that you’re not safe against players who will try to spam through this wall. With the right weapons, you might be able to kill an opponent on this spot.
Requires mid to heavy-penetration weapons.

Mid top
The wall separating mid top and spawn apparently is rather thin that you can actually shoot through it if you hear or detect someone behind it.
Requires mid to high-penetration weapons.
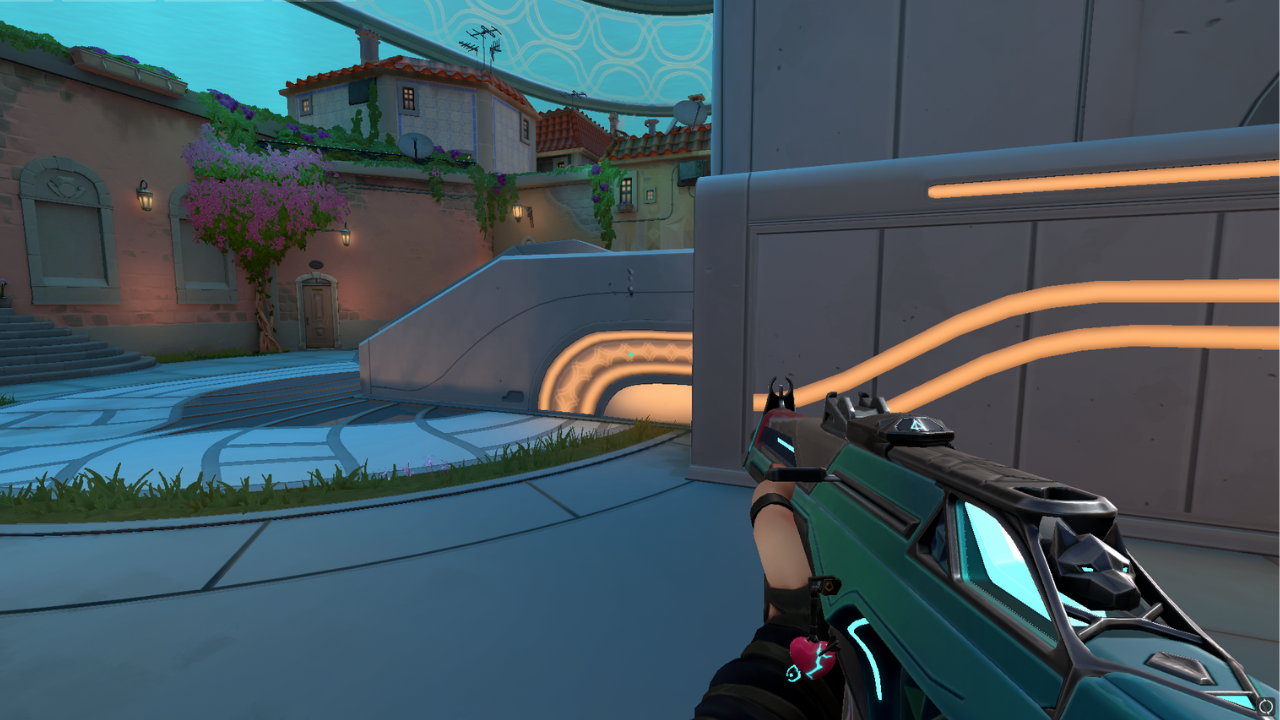
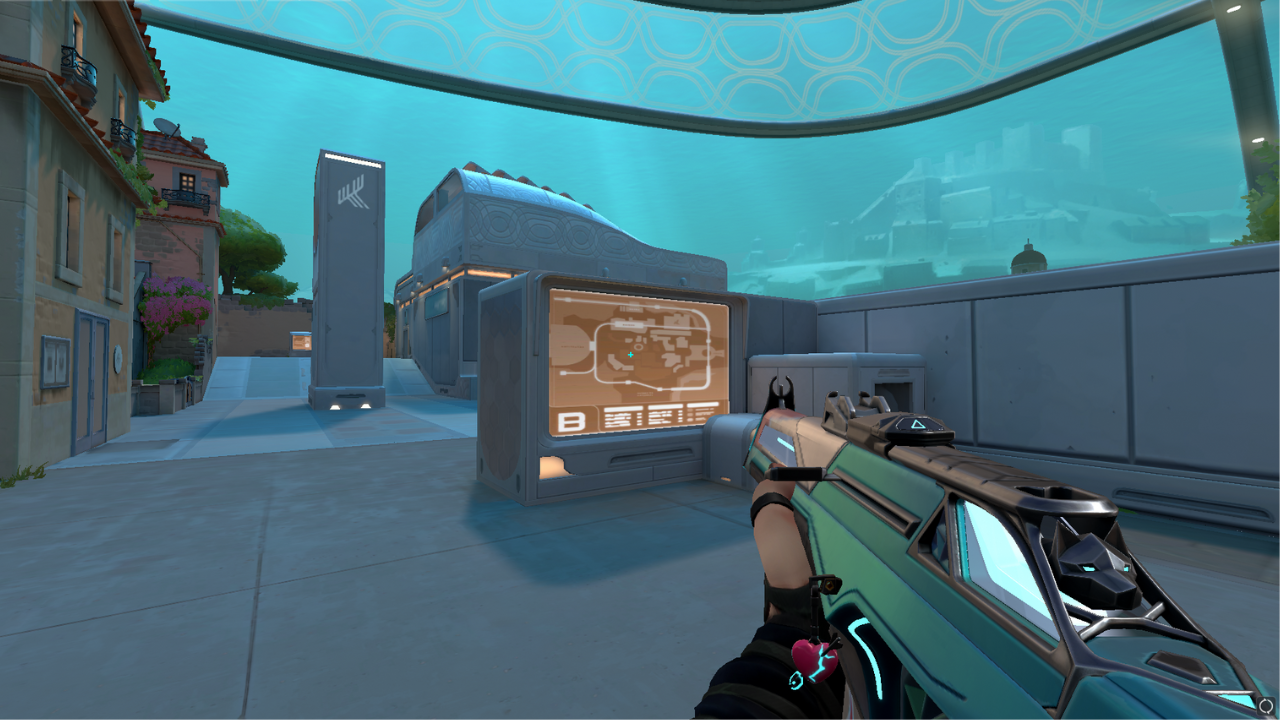
Mid Plaza
Unbeknownst to some, this glowing spot right here can be wallbanged using all type of weapons.
Mid doors
Just like in any other map in Valorant, you can spam through this wooden door to punish enemies who would want to peek from this spot. If you’re an attacker, you can stand on mid top or shop, and try to kill the enemy. At the same time, if you’re a defender, you can also use it the same way and shoot towards mid.
Interestingly, you can shoot all weapons to shoot through it.
B Ramp
This one right here on ramp provides cover to attackers during the start of each execute up until postplant situations. This allows them to be in a better position, without having to fully expose themselves. At the same time, they can simply just ping the location of the spike and shoot through the screen to deny defuse. But, are they really safe? Luckily, defenders can shoot through it as well to eliminate them.
All weapons can be used to penetrate through the screen.
B Screen
The rectangular screen right here can be penetrated using any guns, even the light penetration ones. Players can simply take advantage of the screen to get rid of anyone behind it especially if they have any abilities that can reveal enemies. Take note though that similar to the one at B ramp, you cannot shoot through the metal part.
All weapon types can be used.
B Site
This one right here has a screen that is penetrable by bullets. Shoot through the screen to kill anyone who may try to hide behind it. Similar to the screens attached to Screen and Ramp, it can be shot through using any weapon type.
B Tower
Surprisingly though, you can shoot at opponents through the floor on B tower to eliminate players who may try to cross B tunnel and vice versa.
Only high penetration weapons can work.
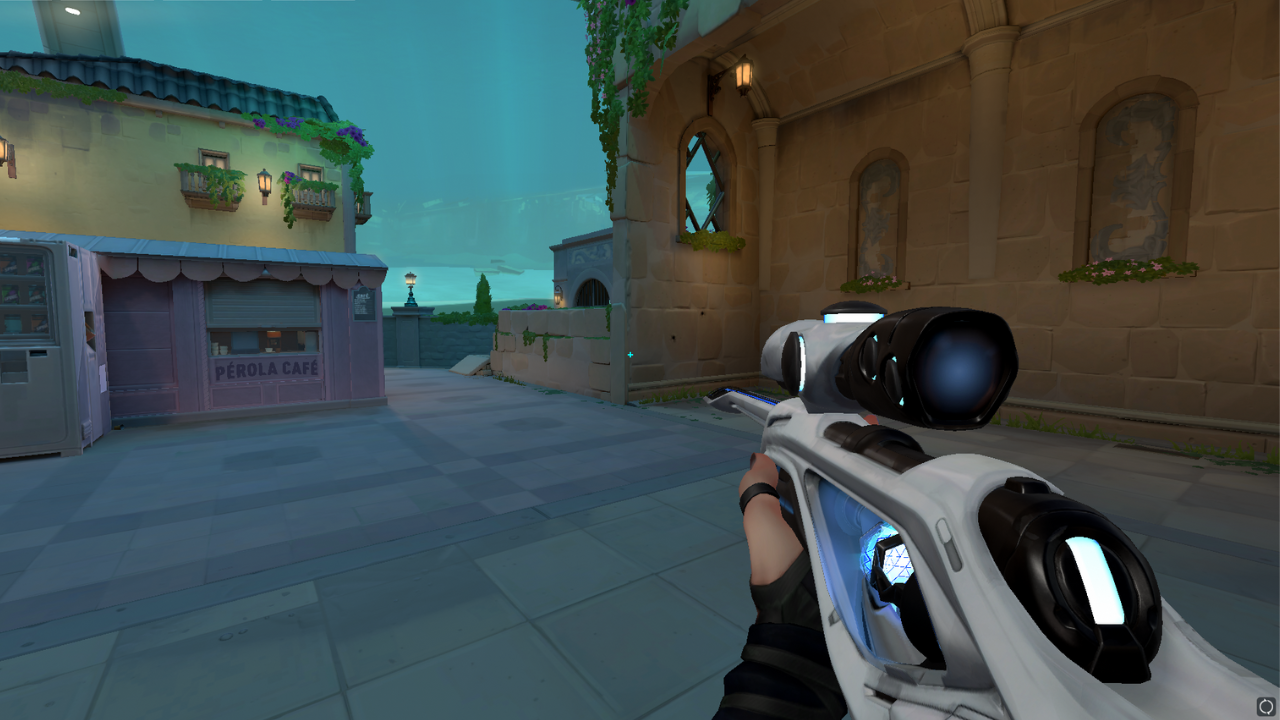
B Shop
Interestingly, there’s this spot right here that you can shoot through if you’re able to detect that someone’s hiding on this corner. Be careful though, as they can easily push you if you ever try to kill them with it.
Requires mid to heavy penetration.
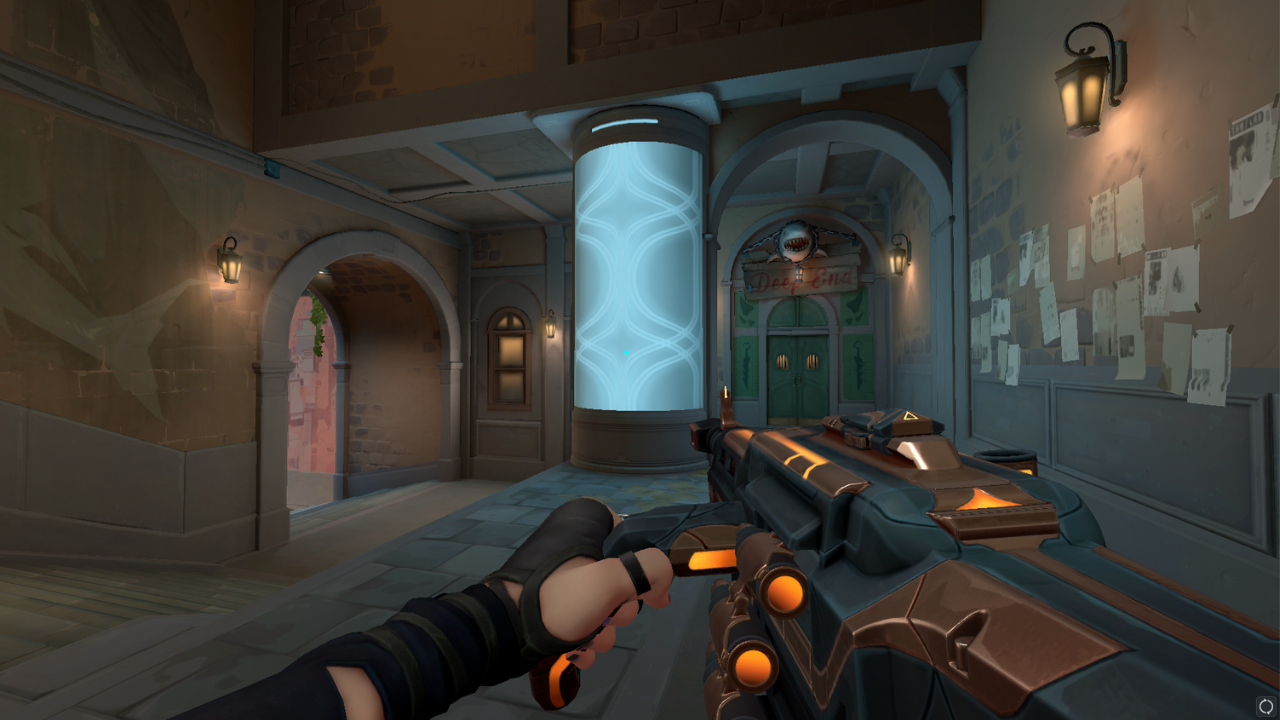
B Club
Head to the club and you will notice a large cylinder. Due to its size, some players may try to hide behind it. But don’t worry as you can also wallbang that spot except for the metal part.
All weapons can be used.
Tune in to @ValorantTracker on Twitter for the latest VALORANT News and Guides.
If you're new to VALORANT Tracker, check out your player statistics, ranked and premier leaderboards, and much more on our site!
Before you leave, check out our Valorant Tracker APP to monitor your in-game performance.
,fit(cover),quality(80)/https%3A%2F%2Fcms.tracker.gg%2Fcontent%2Fimages%2F2026%2F06%2Fe83685974edceceef3fd8e0413dac95762816804-1920x1080.jpg/image.jpg)
,fit(cover),quality(80)/https%3A%2F%2Fcms.tracker.gg%2Fcontent%2Fimages%2F2026%2F06%2FHKBQQI6WQAAMa0a.jpg/image.jpg)
,fit(cover),quality(80)/https%3A%2F%2Fcms.tracker.gg%2Fcontent%2Fimages%2F2026%2F06%2Fpremium-frame-spirited_1200x675_comp.png/image.jpg)
,fit(cover),quality(80)/https%3A%2F%2Fcms.tracker.gg%2Fcontent%2Fimages%2F2026%2F05%2FFortnite-Power-Rankings.jpeg/image.jpg)
,fit(cover),quality(80)/https%3A%2F%2Fcms.tracker.gg%2Fcontent%2Fimages%2F2026%2F05%2FHI9JtYgagAAICE1.jpg/image.jpg)